Tuesday, February 10, 2009

Cycling Goals

Inspired by Dan here are my cycling related goals for the next few years.


2009

  • Cycling Goals


    • At least 4 century rides

    • At least 1 longer ride (double century or 300k)

    • Help Charissa train for this year's MS150

    • Get back into proper cycling shape (i.e. lose 25 lbs)

    • Do at least 1 weekend tour with the whole family


  • Building Goals


    • Design and begin construction on carbon fiber recumbent (possibly along with Dan and maybe a couple others). Inspired by Malric

    • Design and build recumbent Trail-a-bike for Lexi


2010

  • Cycling Goals


    • Ride compete brevet series (on carbon bent)

    • Ride Pgh->DC tour with family (or large part of it anyway)


  • Building Goals


    • Complete carbon bike.


Someday

  • Ride across US (pref with at least 1 of my kids)

  • Ride a long brevet (1000 - 1400k)

  • Ride PBP and/or LEL

  • Tour the Pacific Northwest

Monday, July 21, 2008

Sometimes there are more important things than bicycles.

So I've been off the bike for a few weeks and that will hopefully stretch into a few months. Long story very short, Charissa has had some pregnancy complications with our unborn son Levi. It's called Amniotic Band Syndrome (ABS) and basically the inner Amniotic membrane ruptures and shreds into these thin bands which can wrap around the baby and cause all sorts of problems. Levi has bands affecting both hands. We took a week long trip to Cincinnati to see specialists and have fetal surgery to repair what they could. The challenge now is just keeping the little guy cooking as long as we can. ABS pretty much guarantees a premature birth due to the membranes being compromised. More details and our account of the whole thing so far can be found here.

Your prayers are always appreciated.

-Tim

Thursday, May 1, 2008

Century ride

Last Sunday I joined Dan and Jim for most of Dan's proposed 200k+ ride. I should say upfront that this was an ambitious ride for me in a big way. Prior to this ride I had a total of about 260 miles on this bike and I would increase that by nearly 50% in a single ride. It is the longest ride I've done ever, and the first truly long ride I've done in several years. I was also riding with a couple guys who totally out class me in the fitness and base mileage departments. Jim rode PBP last year, and Dan has been training for a complete brevet series this year. Fortunately they are also really nice guys and were very encouraging. I appreciate that.

I started by riding down to the science center to meet Dan at 6am. I hit my highest speed to data on the way down Marshall at 48mph, but otherwise it was uneventful. We meandered out to Freeport road, crossing the river a couple times along the way. We met Jim at Trizilla and then stopped down the road at a GetGo for restrooms and last minute food selection. There was a bit of confusing following that since the road we had planned to take off of Freeport was closed, but Jim knows the area and was able to get us around without a hitch.

We started out with a short climb and then a nice long series of rolling hills as we passed through Rural Ridge and the surrounding areas. I was feeling good at this point and was probably pushing the hills a little harder than I should, a fact that would catch up to me later. This section ended at a nice downhill and then a moderate climb up Sun Mine road. As would be the pattern for the remainder of the ride, the guys vanished up the hill while I plodded along. Typically for the first half or so of the ride, they'd shoot uphill in front of me, and I'd catch up on the downhill and maybe pass... wash rinse repeat. I expected Jim to climb well as he was riding the lightest bike by probably almost 10 lbs and it's not a recumbent. What surprised me was how well Dan climbs on the p-38. Jim and Dan stayed together on just about every climb of the day.

We continued along until the first stop at about 40ish miles at a sheetz. This was welcome for me, I was starting to get a bit of toe numbness and I just really needed to walk around for a minute or two. I was also starting to feel that I was pushing a bit too hard on the hills and my knees were starting to complain a little.

We continued through Butler and north. Made a 5 mile wrong turn near one of teh Rt 8 crossings that took us through some gorgeous country through which we unfortunately had to back track. My knees were starting to make their complaints heard loud and clear at this point and I was getting worn out by the pace I was setting. We took another short pee break by the side of the road once we set ourselves right here.

Thus began the section that goes around the north edge of Moraine State park. IMHO this is some of the most beautiful country we encountered in the ride. It's also a series of unrelenting rollers that just trash your legs. I was starting to find a better pace for myself tho and that helped a lot. I just needed to climb at my own pace and use my aero advantage to try to catch up when the road went flat or down. We had hoped to stop for lunch at the Cooper Lake campground but it was closed. I stopped and popped a couple ibuprofen to calm the knees and we continued on. A few more rollers along Rt 19 and we stopped for lunch at a gas station with a subway.

I was looking forward to the long descent into Ellwood city at this point. A few more climbs later and we finally found it. A nice longish downhill run followed by several more miles of gradual altitude loss. This combined with lunch brought my energy levels back up nicely. I felt good as we rode river road and turned onto 588.
I was riding my own pace and not trying to keep up with the guys. I had no problems on the flats but once the climbs started I just let them roll out of sight and did my own thing. 588 has one moderately diffucult climb before you cross the turnpike for the first time. We made a quick stop at a gas station at the top. Then more rollers to brush creek road (which is REALLY nice) and onto 989. Jim made a stop at a kids lemonade stand which they thoughtfully set up for passing bikers.

At 989 and Lovi I decided to part company with the guys and go to my wife's Uncle's house in economy instead. I was still feeling good, but I knew I didn't have another 30 miles in my legs. I'd rather stop in good form than hit the wall. Unfortunately this decision meant riding up Dunlap Hill on 989 to get to Conway Wallrose. This hill is of the devil. It's narrow with no shoulders (well craters with loose gravel when you are lucky), it's probably about 12-14% ish in grade and is sustained for a while. Oh and you have pickup trucks doing 50mph about a foot off your left shoulder.... not my idea of a good time. Oh well, I got up it and rode down Conway Wallrose for a mile or so to Uncle David's house. Still feeling good.

Total distance: 111 miles
Average Speed: 14.0 mph

A few general observations: I need to just work with the speed profile of my bike. It's slower going up and faster going down. Trying to force it to do otherwise is just asking for problems. This hasn't been a problem for me until this ride for the simple reason that I've not ridden with anyone else for any significant distance.

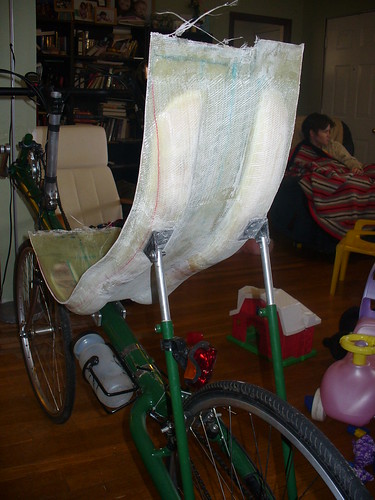
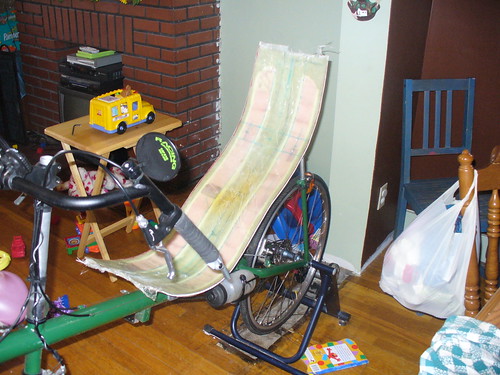
The fact that I can jump on this bike with almost no base mileage and do more than a century without any real problems is remarkable. I would have been crying in pain on the side of the road at about mile 50 had I tried this on my df bike. The fact that I wound up with a respectable if not blazing average speed is equally remarkable. For city traffic and such this bike is fair. A bit worse than an upright in the nastiest conditions (potholes, mostly) but a fair performer. For real distance riding, I can't imagine ever going back to a traditional bike. There are still improvements I can make for the next bike (better frame stiffness, mesh seat perhaps...) but it will be a recumbent.

Monday, April 21, 2008

Sunday ride

So I did my first longish ride on this bike. Check out the route. Overall things went well. Total distance 52 miles, average speed ended up being a pathetic 13.7mph, but there is a bit of a story to that.

I haven't ridden the montour trail at all in about 6 years, so I decided to give it a go. I poked about on google maps for a while and noticed that it intersected noblestown rd out in washington county. I've not ridden noblestown either, but it'll bring me back to the west end bridge... looks good to me.

The first 10 miles to get to the trail flew. Crossing Neville island I was pushing between 20 - 24 mph the whole way. The trail itself is predictably slow. The crushed limestone just sucks energy, and you are riding uphill the whole distance, albeit a very gradual one. There were the usual panoply of kids and families at the start of the trail. The crowds thinned out past Robinson, but the trail conditions also worsened. The climb between Robinson and 79 is long and fairly rough. (rough surface conditions, not rough climb) I was struggling to maintain 12 mph on much of it. Once you get to the plateau at the top the trail conditions get worse yet with a lot of rough gravel, mud, and loose sand. The recumbent is not the ideal platform for such conditions, but I managed. That also killed my averages a bit since I rode a couple miles alternating between 15 and 8 mph due to trail conditions.

Noblestown road on the other hand was a joy. It's a series of nice rollers with almost no traffic until you get close to Carnegie. The climb out of carnegie is long but not bad and there is another climb a few miles later that is about the same. The payoff is the long twisty downhill into the west end which is a lot of fun. You need to dogleg over onto Steuben to get around some construction leading into the west end circle, which I didn't mark on the map, but that's no big deal. Coming over the bridge I started to realize that I hadn't eaten anything on this ride, and that was perhaps unwise. I seem to have a "bonk" ride once a year and this was it.

The clever rider would have stopped at the mini mart at this point and replenished at least enough to get home in good form. I am not clever. Instead I continued on and bonked hard about halfway up brighton. I spent the next several miles watching my average drop from 14.5 mph down to a final count of 13.7. I was struggling to maintain 9mph on flat ground, and was climbing at about 30% of my normal speeds. When I finally got home I almost had to call my wife to help me unlock the garage because my hands were shaking so bad. Stupid, stupid stupid. I do know better. I've done this many times, I know I need to eat about once every 2 hours at a minimum.... oh well.

Overall it was a good ride. I won't do the trail again. It's very pretty, but it's just slow and grueling. Noblestown was a joy though so I'll need to figure out more routes that use it. The bike fealt good overall. I think I need to make a small foam wedge for the seat base since I was sliding down more than I'd like but otherwise it performed well. It just seems to be made for rolling hills and swoopy curves. Once my blood sugar returned to semi-normal levels the only discomfort I have is slightly sore legs.

Monday, April 14, 2008

Seat Building, Finished!

Ok, picking up from where I left off. Once I had the reinforcement on the ribs complete, I needed to put on the final back layer. For this I ordered some knitted fiberglass when I was putting in my order for the epoxy. It's supposed to conform to curves better, and be somewhat stronger, than regular woven glass. It's also a heavier weight fabric than what I had in woven fabrics so I'd only need a single layer for the back. Well it's pretty cool looking stuff anyway.


It does drape reasonably well for such a heavy fabric which is nice. It still took a lot of work though to get it wet out and to lay well into all the compound curves on the back of the seat. This is a process that I think would be better done with a vacuum bag. I probably have 2-4 ounces of extra epoxy in the seat that wouldn't be there if I had a way to compress the material. The finished surface is fairly rough due to the stitching that holds it all together. Using it on a finished mold surface would also be preferable. Having said that I am impressed with this material.


The next step was to apply a couple pieces of reinforcement where the seat mounts would be. In retrospect I think this was totally unnecessary as the finished material is so sturdy. Better to overbuild than have something fail I suppose, particularly since this is really my first experience with the material. (I've prototyped a few ideas in the past with glass, but never followed through with anything)


So the question that plagued me at this point was, how do you accurately mount the seat mount hardware on a surface that curves in all directions. What I came up with was mounting the upper mounts on a threaded rod that is held perpendicular to a piece of square channel AL. The aluminum runs up the centerline of the seat (by eye). And the lower seat mounts are bolted to a block of wood the exact width that the plates are when mounted to the bike, with a cutout for the AL channel. The wood was all cut on the milling machine to ensure accuracy though good skill with a table saw and drill press would have worked fine too. I think the pictures explain it better than I just did. To actually attach the mounts, I used epoxy mixed with milled glass fibers to make a thick paste. I wet sanded (with plain epoxy) the aluminum first to ensure a good bond. I needed a lot of gap filling for the lower mounts since the seat curves so much there. Once that set up I riveted it as well.


I noticed that the knitted glass wasn't totally laminated in two spots on the inside of the rails. What I should have done was drill some small holes and inject epoxy to fill the space. What I actually did was a comedy of errors. I started by grinding off teh knitted glass layer and replacing it with a few layers of regular glass. This was a pain. The following morning I decided it wasn't curing fast enough so I put a hot light on it to speed things up. This worked... a little too well. I proceeded to discolor the epoxy pretty badly. Oh well. It's cured now and it seems strong. I'll just have to live with it. Lessons learned.


Later that day I added the rivets to the now complete seat mounts, and trimmed the seat to width (24cm). I then mounted it on the bike for the first time and sat it to determine where the lower edge should stop. I want to make the total length and shape one of the standard sizes of ventisit pads in the hope of ordering one this summer.


I then trimmed and sanded, and sanded... and sanded ... etc... the seat. A coat of a basic gloss black spray paint later plus some reflective paint on the top half of the seat and I was done! Well, I also had to cut a new seat pad.


Wednesday, April 9, 2008

Wheel Building

So I am swapping out the rear wheel I've been using on the bike for the one from my mtb. It's a pretty decent quality wheel, LX hub laced to a Rhynolite rim. The problem is the rim. It's much too wide for the narrow tires I am running on this bike, so I need to swap the rim. I have a SUN CR-18 rim laying around that I bought on nashbar closeout a year or so ago for a couple dollars. I'm a huge CR-18 fan. They are reasonably light and totally bombproof. I've used rims from other makers and I feel that the CR-18 is equal to any, and costs a fraction. They aren't flashy or aero or anything, but they make a strong long lasting wheel that will take a beating. They also have the same ERD as the Rhynolite so no need to change spokes.

To make the swap, first I removed the casette. This is optional but I'm replacing it too, so it's just easier to do at the beginning. Next I took the new rim and taped it next to the old one with a few wraps of masking tape. I aligned the valve holes and made sure the spoke offsets were going the correct way. I then loosened all the spokes on the side with the new rim and moved them over one by one. I cleaned the spokes and lubed the nipples as I did this. I then went to the other side and started moving spokes over. Start by moving all the spokes that are crossed to the inside of the wheel, then doing the ones to the outside. As I moved the spokes I tightened the nipples so that there was about 2mm of thread showing.

Once all the spokes were moved, I untaped the now free rhynolite rim and set it aside and got to the business of tensioning and truing. I start by tightening all the nipples with a screwdriver so that they just cover the threads. I then went around the wheel tensioning the spokes. I did 2 rounds of 2 turns each for this one. That brought me close to a good tension on this wheel. Before truing I went around and brought all the spokes to even tension by pitch. I then started truing the wheel. I needed to do a fair bit of rounding for this one, the hub was basically off center by about 2 mm. Rounding always takes longer since you need to do up to half the spokes at a time. It also requires more turns to effect a change. I then trued the wheel before checking it for dish. The dish was pretty off (usually is on rear wheels), so I went around tightening the drive side spokes till it was dished properly. I just tightened rather than alternating tightening and loosening to bring the tension higher. I've built quite a few wheels with this rim type so I have a good feel for the tone the spoke should make when it's plucked at the right tension. This one needed to be brought up a little more, so I was favoring tightening.

Once I was happy with the dish, I did a rough truing then stress relieved the spokes by grabbing parallel pairs and squeezing as hard as I could all the way around the wheel a few times. Then I did a finish truing. I put a dial gauge on it, and I'm good within about 0.3mm. Good enough. Lastly I put the new cassette on. It's an 8 sp SRAM 11-28.

All told it took a couple hours working at a relaxed pace and explaining to my 7yo what I was doing.


Tuesday, April 8, 2008

Seat building part III

So the next step in building the seat was to mark out the centerline. I had marked a rough centerline on the mold, but I wasn't too sure about it. So I pulled the set glass form off the mold and put it on the sling seat form and sat in it. I then had my lovely wife mark my spine location directly on the glass. I then put it back on the mold and used the string trick to draw the line.

From that line I marked out the edges of the ribs by marking out lines parallel to the centerline. I think the ribs are something like 6cm from center but I can't remember and I'm not running downstairs to measure right now. One of the things about my design is that the seat stay mounts have to go on the ribs rather than between them. To accommodate this I am going to leave flat sections on the ribs at those spots and the bulk them up with several layers of glass.

To create the ribs I ended up using blocks of pink foam cut and spray-mounted to the back of the seat. I started by ripping strips that were 2" wide by 1.5" tall. I then applied them by mitering them by hand and mounting them 1 x 1.


The next step in shaping them was to use a compass to scribe a line on both sides 1" high. I then used a hacksaw blade to trim the height to this line. I then shaped the foam as best I could using a surform plane and sand paper to a nice round cross section with tapered ends. The spray mount didn't work real well for this BTW, the blocks kept falling off and generally being a pain. If I do this again, I'm going to use epoxy or possibly just spray foam.


I then mixed up some fairing compound using glass bubbles and epoxy and used that to glue down any particularly recalcitrant blocks, fillet the join to the seat, and fill any gaps between blocks. This also didn't work as well as I'd have liked. It was difficult to put it where I wanted it and get it smooth. In the end its OK but not great. Also something I'd do differently next time.


I came back the next day when the filler set up and tried to smooth out the nasty bits using the surform, files, sandpaper, and various dremel attachments. In the end I found the wire wheel on the dremel to give the best control, but it was a pain and ate up the foam if I wasn't really careful. I did mess up a few spots, so I used spray foam to back fill them and then cut and smoothed it out. This worked reasonably well. The spray foam isn't totally consistent throughout, so there are some bubbly bits, but it's good enough to keep the glass in place. Finally a technique that shows some promise!


While the spray foam was setting, prior to trimming it, I cut up some fiberglass. I cut 4.5" wide strips to cover the ribs from a lighter glass (5oz I think). I also cut them on a 45deg bias to allow it to drape better. I cut a total of 6 strips, but I was only able to apply one layer tonight because I ran out of epoxy. Darn. I ordered some this morning expecting this to be a problem, but I won't have it till Thurs or Friday, so I'm stuck till then. Still, things are progressing. I discovered that the bottom of my epoxy container contains a lot of semi-hard gunk. I'm a little worried that the stuff might not be 100% good, so it's probably good that I'm getting new stuff. It seems to have hardened ok so I'm keeping my fingers crossed and we'll see how it goes.