Showing posts with label bicycle. Show all posts

Monday, April 14, 2008

Seat Building, Finished!

Ok, picking up from where I left off. Once I had the reinforcement on the ribs complete, I needed to put on the final back layer. For this I ordered some knitted fiberglass when I was putting in my order for the epoxy. It's supposed to conform to curves better, and be somewhat stronger, than regular woven glass. It's also a heavier weight fabric than what I had in woven fabrics so I'd only need a single layer for the back. Well it's pretty cool looking stuff anyway.


It does drape reasonably well for such a heavy fabric which is nice. It still took a lot of work though to get it wet out and to lay well into all the compound curves on the back of the seat. This is a process that I think would be better done with a vacuum bag. I probably have 2-4 ounces of extra epoxy in the seat that wouldn't be there if I had a way to compress the material. The finished surface is fairly rough due to the stitching that holds it all together. Using it on a finished mold surface would also be preferable. Having said that I am impressed with this material.


The next step was to apply a couple pieces of reinforcement where the seat mounts would be. In retrospect I think this was totally unnecessary as the finished material is so sturdy. Better to overbuild than have something fail I suppose, particularly since this is really my first experience with the material. (I've prototyped a few ideas in the past with glass, but never followed through with anything)


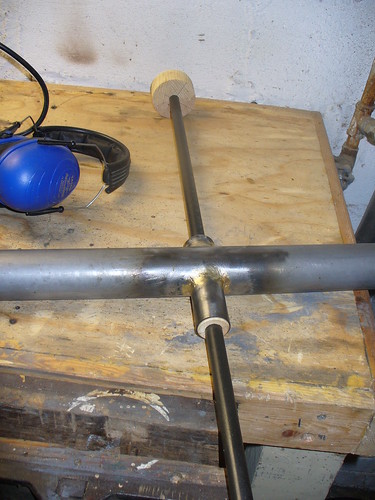
So the question that plagued me at this point was, how do you accurately mount the seat mount hardware on a surface that curves in all directions. What I came up with was mounting the upper mounts on a threaded rod that is held perpendicular to a piece of square channel AL. The aluminum runs up the centerline of the seat (by eye). And the lower seat mounts are bolted to a block of wood the exact width that the plates are when mounted to the bike, with a cutout for the AL channel. The wood was all cut on the milling machine to ensure accuracy though good skill with a table saw and drill press would have worked fine too. I think the pictures explain it better than I just did. To actually attach the mounts, I used epoxy mixed with milled glass fibers to make a thick paste. I wet sanded (with plain epoxy) the aluminum first to ensure a good bond. I needed a lot of gap filling for the lower mounts since the seat curves so much there. Once that set up I riveted it as well.


I noticed that the knitted glass wasn't totally laminated in two spots on the inside of the rails. What I should have done was drill some small holes and inject epoxy to fill the space. What I actually did was a comedy of errors. I started by grinding off teh knitted glass layer and replacing it with a few layers of regular glass. This was a pain. The following morning I decided it wasn't curing fast enough so I put a hot light on it to speed things up. This worked... a little too well. I proceeded to discolor the epoxy pretty badly. Oh well. It's cured now and it seems strong. I'll just have to live with it. Lessons learned.


Later that day I added the rivets to the now complete seat mounts, and trimmed the seat to width (24cm). I then mounted it on the bike for the first time and sat it to determine where the lower edge should stop. I want to make the total length and shape one of the standard sizes of ventisit pads in the hope of ordering one this summer.


I then trimmed and sanded, and sanded... and sanded ... etc... the seat. A coat of a basic gloss black spray paint later plus some reflective paint on the top half of the seat and I was done! Well, I also had to cut a new seat pad.


Wednesday, April 9, 2008

Wheel Building

So I am swapping out the rear wheel I've been using on the bike for the one from my mtb. It's a pretty decent quality wheel, LX hub laced to a Rhynolite rim. The problem is the rim. It's much too wide for the narrow tires I am running on this bike, so I need to swap the rim. I have a SUN CR-18 rim laying around that I bought on nashbar closeout a year or so ago for a couple dollars. I'm a huge CR-18 fan. They are reasonably light and totally bombproof. I've used rims from other makers and I feel that the CR-18 is equal to any, and costs a fraction. They aren't flashy or aero or anything, but they make a strong long lasting wheel that will take a beating. They also have the same ERD as the Rhynolite so no need to change spokes.

To make the swap, first I removed the casette. This is optional but I'm replacing it too, so it's just easier to do at the beginning. Next I took the new rim and taped it next to the old one with a few wraps of masking tape. I aligned the valve holes and made sure the spoke offsets were going the correct way. I then loosened all the spokes on the side with the new rim and moved them over one by one. I cleaned the spokes and lubed the nipples as I did this. I then went to the other side and started moving spokes over. Start by moving all the spokes that are crossed to the inside of the wheel, then doing the ones to the outside. As I moved the spokes I tightened the nipples so that there was about 2mm of thread showing.

Once all the spokes were moved, I untaped the now free rhynolite rim and set it aside and got to the business of tensioning and truing. I start by tightening all the nipples with a screwdriver so that they just cover the threads. I then went around the wheel tensioning the spokes. I did 2 rounds of 2 turns each for this one. That brought me close to a good tension on this wheel. Before truing I went around and brought all the spokes to even tension by pitch. I then started truing the wheel. I needed to do a fair bit of rounding for this one, the hub was basically off center by about 2 mm. Rounding always takes longer since you need to do up to half the spokes at a time. It also requires more turns to effect a change. I then trued the wheel before checking it for dish. The dish was pretty off (usually is on rear wheels), so I went around tightening the drive side spokes till it was dished properly. I just tightened rather than alternating tightening and loosening to bring the tension higher. I've built quite a few wheels with this rim type so I have a good feel for the tone the spoke should make when it's plucked at the right tension. This one needed to be brought up a little more, so I was favoring tightening.

Once I was happy with the dish, I did a rough truing then stress relieved the spokes by grabbing parallel pairs and squeezing as hard as I could all the way around the wheel a few times. Then I did a finish truing. I put a dial gauge on it, and I'm good within about 0.3mm. Good enough. Lastly I put the new cassette on. It's an 8 sp SRAM 11-28.

All told it took a couple hours working at a relaxed pace and explaining to my 7yo what I was doing.


Wednesday, November 21, 2007

Yay! Headtube!

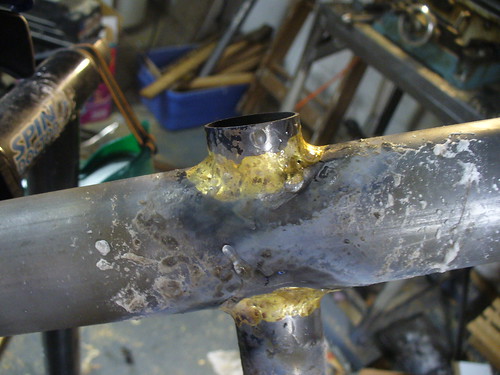
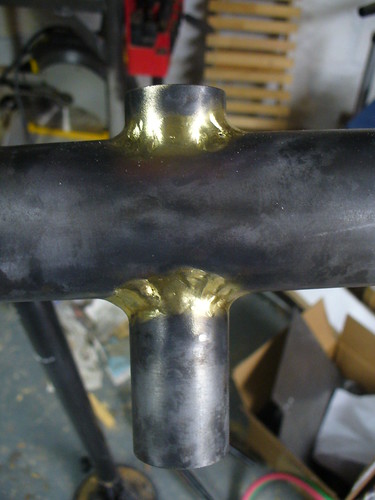
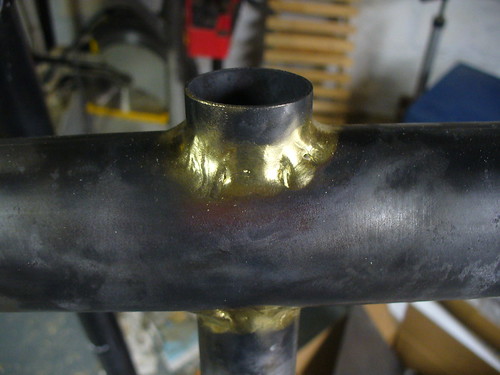
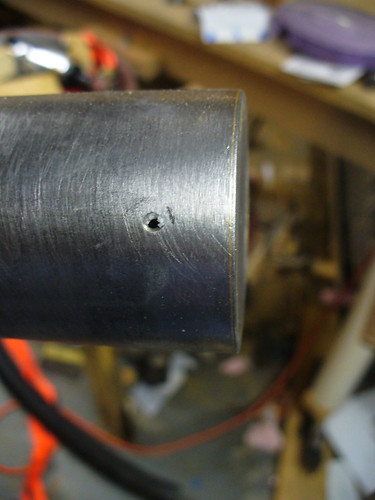
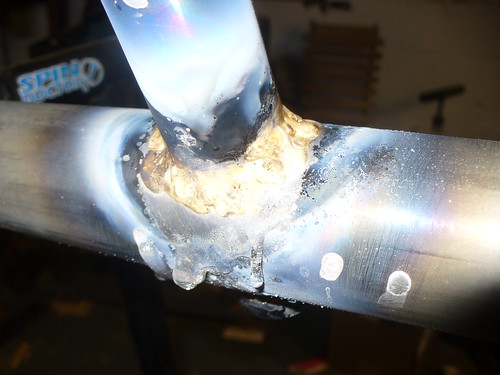
So I have to say that nova rocks. I ordered a new HT on Friday, I was expecting it to take a week with the holiday and all. I got it on Monday! So yesterday I cut it to length, cut the hole in the frame, and brazed it in place. I am MUCH happier with the brazing on this one. I didn't cook the tube nearly as much. There is very little charred flux (as you can see on the first image). The cleaned up shot is just after hitting it with a wire wheel on the angle grinder. I think I'll leave it like that. I'm no pro yet, but I'm pretty happy with that braze.


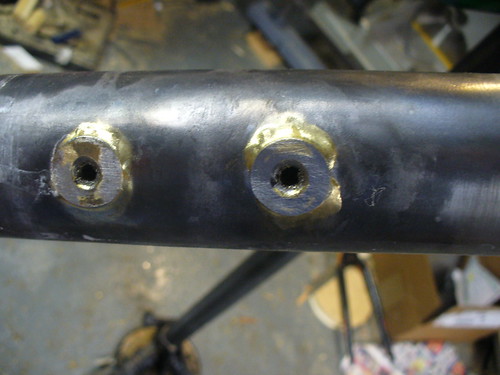
I also brazed in the seat mounts and the rear cap plate the other day. The seat mounts got good penetration, I'm quite happy with them. There are a few slightly dry edges, but I'm confident I got good penetration deeper into the joint, I just should have pushed the brass in more all the way round. I was trying to be too tricky by pushing it at only the top and bottom and using the heat to pull it around. On the whole this worked pretty well, but I missed a few spots.


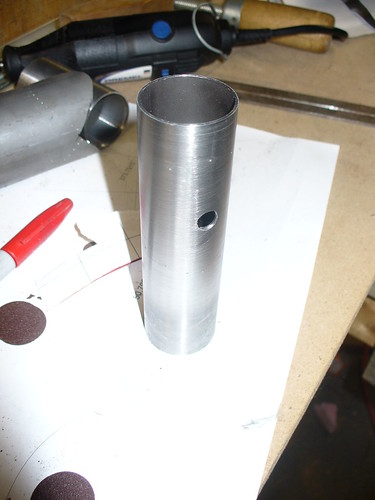
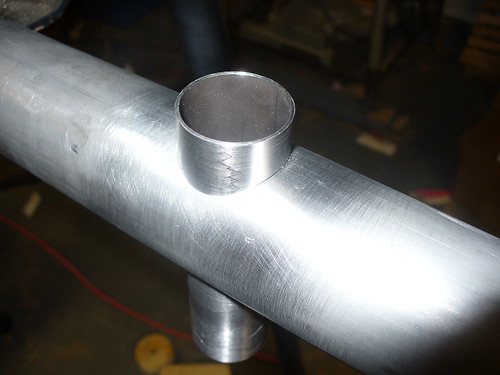
This is the cap at the end of the maintube. I just slip brazed it as it's only moderately structural. It provides some protection against collapsing the tube, but that shouldn't require much and a thin slip braze should be sufficient. I also think I built up a good inside fillet. I put a lot of brass into this joint and not much was left outside. I didn't lose any to the floor, so it has to be somewhere.


Tuesday, November 13, 2007

Head Tube and Rear Fork progress

I made a lot more progress in the last week. Again time has been short, but I got another good day in last weekend and have been getting more efficient otherwise. Overall I'm getting pretty good at joint cleanup and metal shaping. The head tube joint is VERY good, no wiggle at all. The BB is quite tight. It's perfectly parallel with the maintube and within about a degree on rotation just on the initial fitting. I'll sort out the rotation error when I do the final fit, but that's remarkably good for a first effort IMHO.


The thing I need the most work on is brazing. The joints are turning out ok, but not stellar. I roasted the headtube a bit. Note the charred flux. I'm pretty happy with the rear dropout brazing actually. I got really good penetration. I ran a larger tip on the torch and that helped quite a bit. I definitely ran it hotter than the previous joints, but it went MUCH faster, so I'm satisfied with the results. I'm not worried about the HT brazing since it's such an inherently strong configuration. I probably could have tacked it and it would have been more than strong enough.


I had a really cool setup for aligning and brazing the rear dropouts but the camera batteries were dead that day so I didn't get any photos. The Breezer dropouts I used were harder to use than I had thought. They look like they are cylindrical in cross section but they are actually slightly conical. I fitted them by clamping both legs to a board so that the ends were close together and filing them evenly. But I had to do a lot of dremel work to fit the conical section of the dropouts.


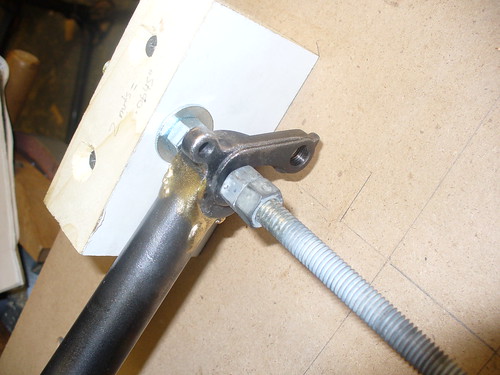
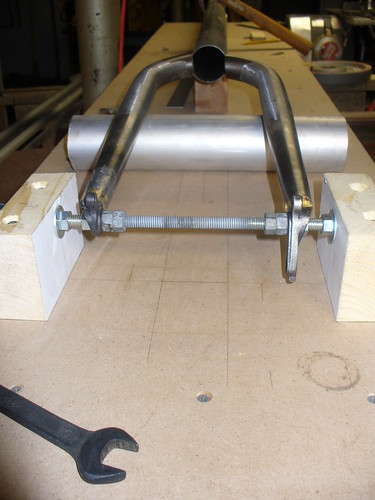
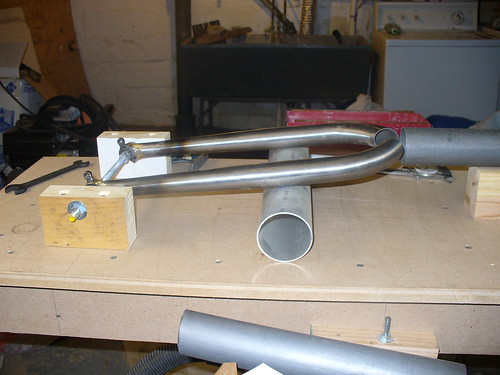
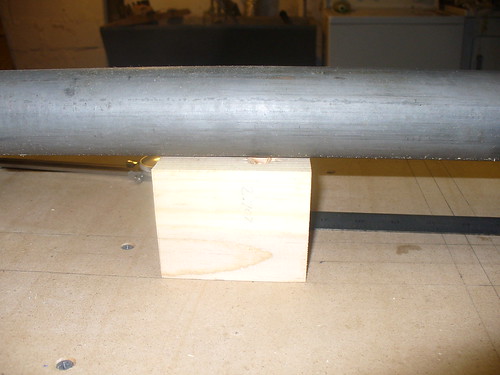
To align the rearfork, I first made a false axle supported between two wood blocks. I used a 3/8" rod for the false axle and carefully aligned it perpendicular to the maintube with the fixed nuts set at 135mm apart. I then made wood offset blocks to hold up the maintube at a fixed dimension (2.707") above the plane of the jig. I used a scrap of 2.5" AL tubing to center the ends of the rearfork on the maintube. To miter them, I'm going to use either a laser or just a pencil to scribe around the maintube onto the rearfork arms. I'll need to mount the maintube temporarily behind the rearfork connection to scribe the back. I still need to clamp everything in place. These pics are just a preliminary fit.


I should explain the piece of 5/8" tube running through the headtube. It's held in place with press-fit wood spacers that I turned on the metal-lathe to keep it centered. The cylinder on the end is turned to the same diameter as the width of the BB shell. I will also turn one that is 2" diameter the same as the maintube. By mounting this and then squaring it to the jig, I can ensure that the headtube is perpendicular to the rearfork within good tolerances. I can also use the 68mm one to ensure that the BB is square. I'll post more pics of the technique as I get to it.