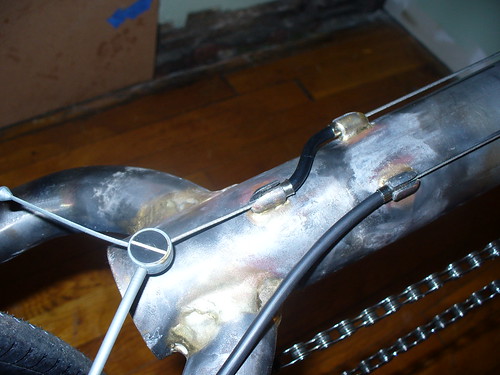
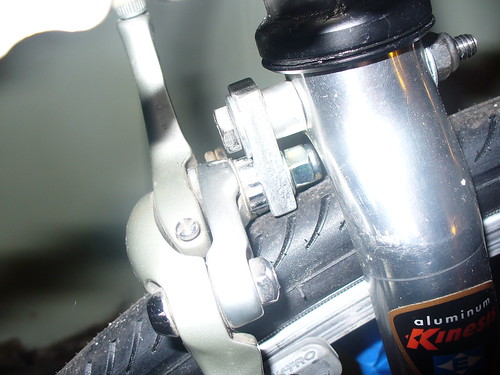
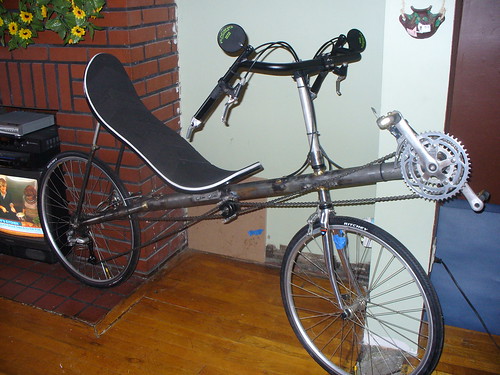
The other bit of metalworking I needed to do (albeit a very simple one) was make the drop bolt for the front brake. I was going to use a bmx U brake, but after installing it it just didn't have the right look. And by "the right look" I mean that it was literally twice as wide as the fork crown. It would have worked ok, but I'm very happy with the solution I have.
To make the drop bolt I just drilled two holes 15mm apart through a piece of 1/4" 6061-T6 aluminum. I also made a spacer by turning a piece of AL rod in the lathe and boring it out to 1/4" (the closest drill bit I had to 6mm) . The spacer is to help keep the bolt centered in the recessed hole on the back of the fork as well as spacing the drop bolt plate away from the fork enough for the nut that holds the brake in place to clear. If I didn't have a lathe, I would have just used a second Aluminum plate and countersunk the back of it to use a normal barrel nut to hold the brake on. To keep the bolt centered, I probably would have used a second barrel nut, drilled out so that the bolt could slide through it sans-threads.
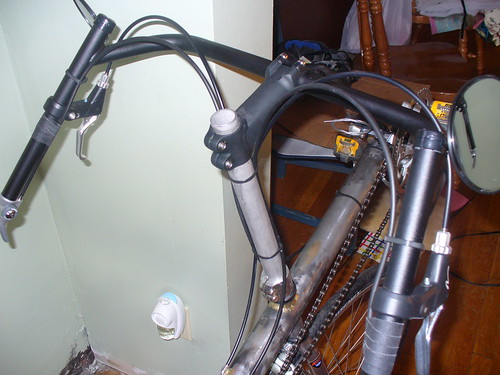
I decided to go with a volae handlebar rather than the bacchetta one I was planning on originally. The volae has open ends above the hands to allow for bar-end mirrors. This let me go with MUCH cheaper mirrors which more than offset the extra $10 the volae bar cost. I also just like the look and feel of it.
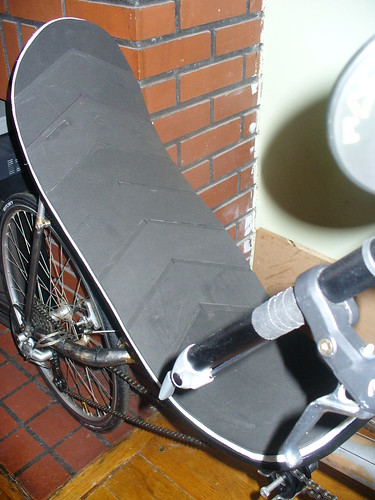
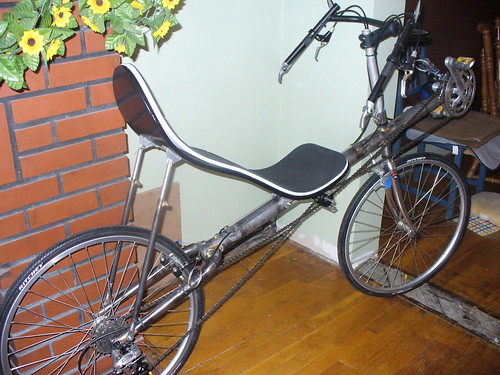
Onto the seat. I decide to just go with black paint for the seat. I started by priming it with some white oil-based primer I had bought for the bathroom remodel. It gives a nice base, is obscenely durable, and sands nicely. It's a compelte pain to paint though. On top of that I used a bit of sandable spray primer, then several coats of black spraypaint. I'm happy with the looks, and it should be reasonably durable and easy to retouch if needed.
The seat pad is made from a layer of closed cell foam (think backpack straps/back panels) with a solid layer of funfoam covering it, and a second layer of funfoam with the chevron shapes cut out. I attached the white foam to the seat with carpet tape. It should be removable if I ever desperately need to, but it will be a pain. The foams are glued to each other with spray adhesive. My tests show that once dried this stuff is much stronger than the foam itself, so it should last well. Overall I'm very happy with how this came out. It looks sharp.
Next step was to build it up! I decided to go with a loose housing cable routing on the handlebars since it seems to produce nice curves and means less housing/cable. I like the look of it and am very happy with the shifting and braking. Everything is smooth. After the initial build I did have to take a few things apart and re-grind the rear brake attachment a little for some extra chain clearance, but it didn't prove to be a big deal. when I pull it apart for paint I'll probably take a hair more off since I'll ultimately be using a 32 tooth large cog in the rear and there is only a 30 on there now.

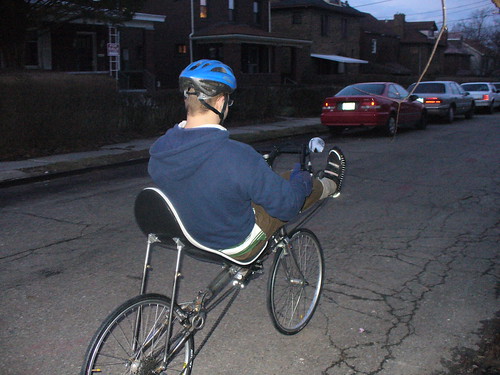
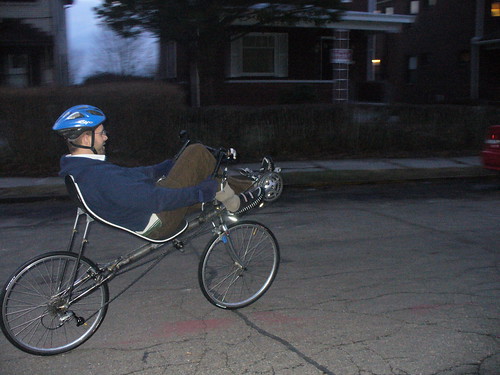
So the next step is to test ride it! I'll say this... it's weird. Like learning to ride a bike again. I know HOW it works, but all my hard earned muscle memory is practically useless since it's 90 degrees out of phase. Still I was able to start and stop and ride in a straight line within 5 minutes. I expect it'll take about 250 miles of practice before I'm willing to commute on it, but that will put be back riding to work not later than mid-april if all goes well, possibly earlier.
Overall I'm very happy with it.


Next step is paint. I was going to do more rides with it as a bare frame, but I have decided not to for 2 reasons. The first is that it's still winter here so the roads are wet and salted which isn't exactly good for bare steel. Also it's bloody awful out with temps all over the place from 0F to 40F and regular snow/freezing rain/ etc. I'll ride these conditions on my upright, but no way on a totally unfamiliar bike. I'll paint it now and if I do need to do any other changes/fixes to the frame I'll just have to deal with it then.
I picked up a sandblaster gun from harbour freight last night along with some glass shot. I'm going to hit it with this first to remove any remaining flux, surface rust, etc. I'll "wet sand" it with a solvent and steel wool. Then wipe it down really well with a solvent. I'll give it a primer and color coat using spraypaint. I may bake it using a simple temporary oven up to 200F for an hour or so to make the paint harder. I'm doing tests right now to see how well this will work so this is TBD. I don't expect a rattle can job to be stellar, but if I can make it last a year or so, that's good enough. Eventually I'll get it powder coated.

No comments:
Post a Comment